If you are running a VPS with a modest amount of RAM (like 8GB or 12GB), you’ve likely encountered the “Swap Death Spiral.” Your RAM fills up, the system starts […]
Read MoreLatest Post
Privacy Policy
Privacy Policy for timdinh.com Effective Date: January 2020 At timdinh.com, accessible from https://timdinh.com, one of our main priorities is the privacy of our visitors. This…
Explore What’s New on the Blog
Whats Hot Right Now
Stop Renting Your Privacy: Why You Need to Roll Your Own VPN Server
If you watch YouTube or listen to podcasts, you’ve heard the pitch a thousand times: “Protect your privacy, hide your IP, and unlock content with [Insert Big-Name VPN Here].” Commercial […]
Read More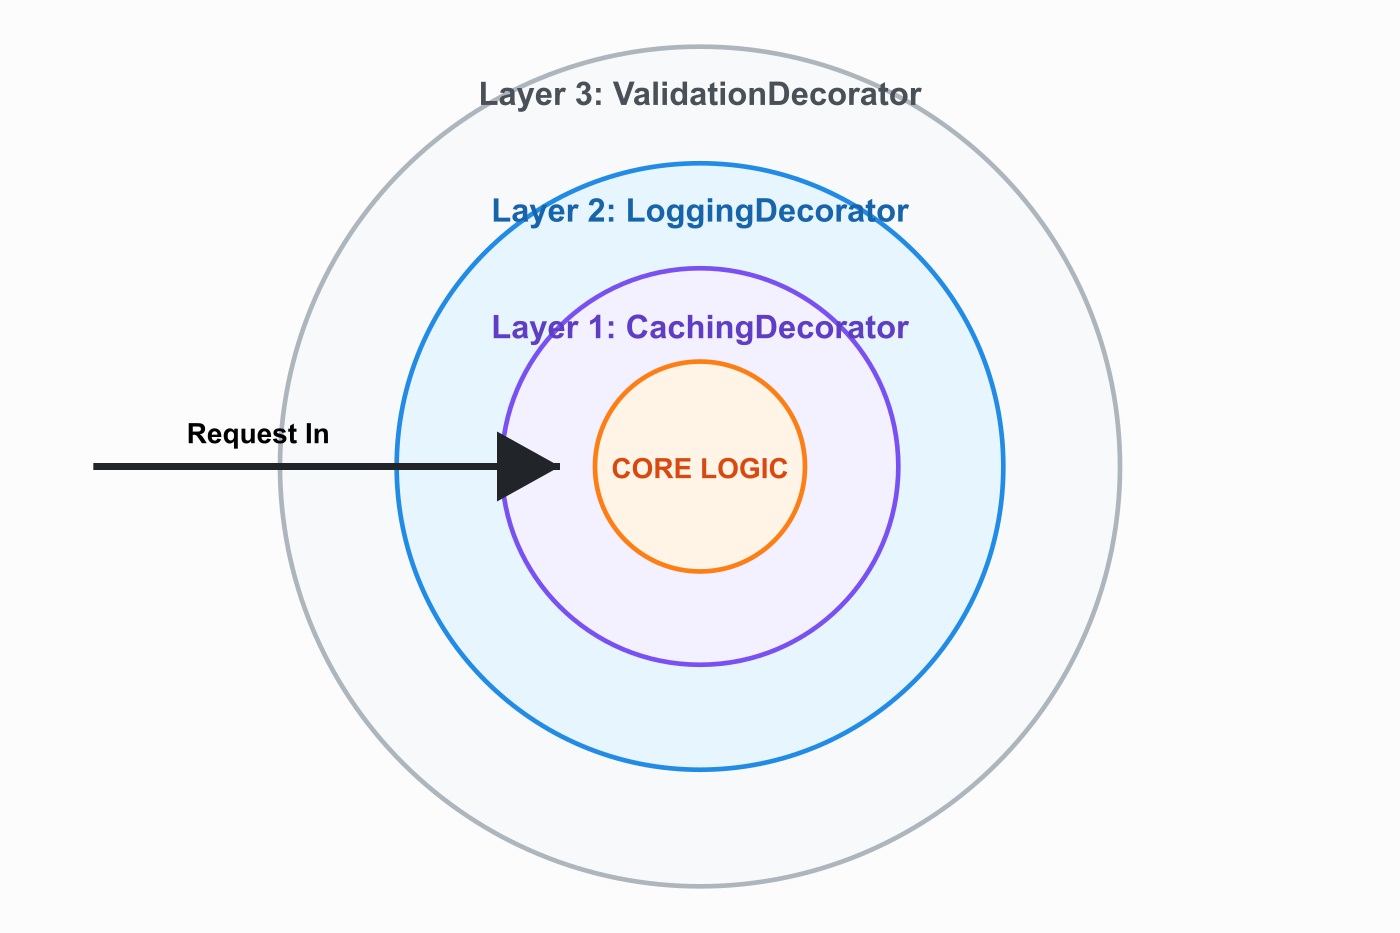
Clean Code: Mastering the Decorator Design Pattern in C
In modern software development, we are constantly told to follow the S.O.L.I.D principles. But in the real world, requirements grow, and classes quickly become “God Objects”—bloated files that handle business […]
Read MoreWhy You Should Use a Read-Only DbContext in addition to your normal DbContext
As .NET developers, we often reach for Entity Framework Core (EF Core) as our default data access layer. Typically, we spin up a single AppDbContext, register it in our Dependency […]
Read MoreThe Hybrid Revolution: Why .NET MAUI Blazor Hybrid is Winning Over Native XAML
This blog post explores why many developers—especially those in the .NET ecosystem—are shifting toward .NET MAUI Blazor Hybrid instead of traditional XAML-based approaches for cross-platform development. In the world of […]
Read MoreFire and Forget: Mastering Asynchronous Background Processing in ASP.NET Core
One of the quickest ways to kill your API’s performance is to force the user to wait for things they don’t actually need to witness. If a user clicks “Register,” […]
Read More
Why Ultahost is the Future of Web Hosting: NVMe Speed, Total Privacy, and Crypto Payments
Finding the right web host used to be a choice between “fast but expensive” or “cheap but slow.” But the landscape is changing. If you are a developer, a privacy […]
Read MoreSecure Your Local Development: Generate HTTPS Certificates for .test or .internal Domains
In today’s web development landscape, HTTPS isn’t just for production—it’s a necessity for local development and testing. Modern browsers enforce strict security policies, and features like authentication cookies or service […]
Read MoreEmbracing Clean Code: Why Quick Hacks Are OK—But Only Temporarily
Introduction If you’ve been coding for more than a minute, you know the feeling: you’re under pressure to get a feature out ASAP or fix a critical bug. In these […]
Read More